Nissan Juke Service and Repair Manual : A/C auto AMP
Removal and Installation
REMOVAL
1. Remove audio unit. Refer to AV-38, "Removal and Installation".
2. Remove inside key antenna (instrument center). Refer to DLK-188, "INSTRUMENT CENTER : Removal and Installation".
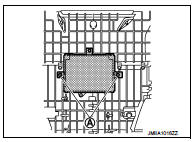
3. Remove fixing screws (A), and then remove A/C auto amp.
INSTALLATION
Install in the reverse order of removal.
 Controller
Removal and Installation
REMOVAL
Remove multi display unit. Refer to IP-13, "Removal and Installation".
INSTALLATION
Install in the reverse order of removal. ...
 Ambient sensor
Removal and Installation
REMOVAL
1. Remove bumper fascia assembly. Refer to EXT-13, "Removal and
Installation".
2. Disengage fixing pawl, and then remove ambient sensor (1)
from air gu ...
Other materials:
Blower motor
Diagnosis Procedure
1.CHECK SYMPTOM
Check symptom (A or B).
Which symptom is detected?
A >>GO TO 2.
B >>GO TO 7.
2.CHECK FUSE
1. Turn ignition switch OFF.
2. Check 15A fuses (Nos. 14 and 16, located in fuse block (J/B)].
NOTE:
Refer to PG-22, "Fuse, Connector and T ...
Reservoir tank cap
Inspection
• Check valve seat of reservoir tank cap.
- Check if valve seat (A) is swollen to the extent that the edge of the
metal plunger (B) cannot be seen when watching it vertically from
the top.
- Check if valve seat has no soil and damage.
• Pull negative-pressure valve to open i ...
Meters and gauges
1. Tachometer
2. Engine coolant temperature gauge
3. Vehicle information display
— Odometer/twin trip odometer
— Trip computer
— Torque vectoring AWD (AWD model)
— Outside air temperature
4. Fuel gauge
5. Speedometer
6. Warning/indicator lights
7. Instrument brightness ...
