Nissan Juke Owners Manual : Setup function
While in the Drive mode, the following items can be set up by pressing the SETUP button.
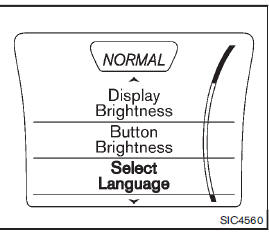
• Display Brightness
• Button Brightness
• Clock Time Setting
• Select Language
• Select Units
• Auto Interior Illumination
• Selective Door unlock
• Auto Headlight Sensitivity (if so equipped) • CLIMATE ECO
NOTE:
• The SETUP function cannot be adjusted while driving.
• When the battery is disconnected, the SETUP memory is erased and reverts to the default settings. If necessary, reset the SETUP memory after reconnecting the battery.
Setting Display Brightness and Button Brightness
1. Press the Drive Mode Select button.
2. Press the SETUP button.
3. Turn the Selection dial to “Display Brightness” or “Button Brightness” then press the ENTER button.
4. Turn the Selection dial to + to increase brightness or to − to decrease brightness, then press the ENTER button to apply the selection.
Display Brightness and Button Brightness can be manually adjusted during the day (when the headlight switch is off) or at night (when the headlight switch is on).
When the bar is at the minimum or maximum brightness level, the brightness level is the same as the daytime level (headlight switch is on) or nighttime level (headlight switch off).
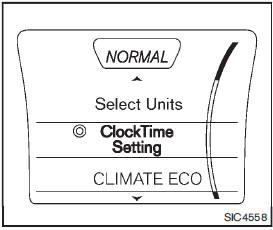
Clock Time Setting
NOTE:
Clock Time Setting is used for displaying the ECO information. See “Eco information” .
1. Press the Drive Mode Select button.
2. Press the SETUP button.
3. Turn the Selection dial to “Clock Time Setting”, then press the ENTER button.
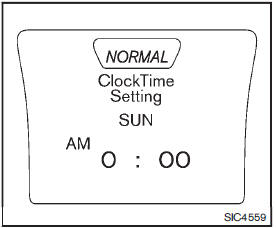
4. Turn the Selection dial to select the day of the week, then press the ENTER button to apply the selection.
5. Turn the Selection dial to select the hour and AM or PM, then press the ENTER button to apply the selection.
6. Turn the Selection dial to select the minutes, then press the ENTER button to apply the selection.
Select Language
1. Press the Drive Mode Select button.
2. Press the SETUP button.
3. Turn the Selection dial to “Select Language”, then press the ENTER button.
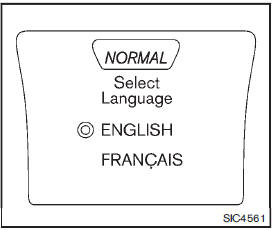
4. Turn the Selection dial to select the preferred language, then press the ENTER button to apply the selection.
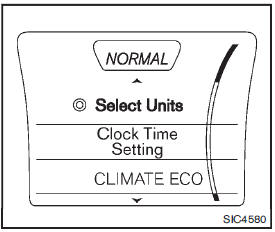
Select Units
1. Press the Drive Mode Select button.
2. Press the SETUP button.
3. Turn the Selection dial to “Select Units” then press the ENTER button.
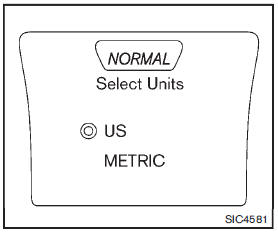
4. Turn the Selection dial to select “US” or “METRIC”, then press the ENTER button to apply the selection.
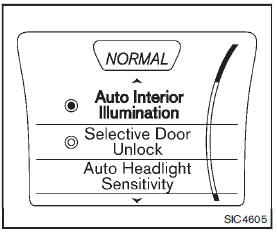
Auto Interior Illumination
Select to turn the illumination of the interior lights on or off when any door is unlocked.
1. Press the Drive Mode Select button.
2. Press the SETUP button.
3. Turn the Selection dial to “Auto Interior Illumination” then press the ENTER button.
4. Turn the Selection dial to select “ON” or “OFF”, then press the ENTER button to apply the selection.
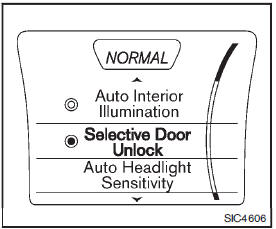
Selective Door Unlock
When this item is turned on, only the driver’s door is unlocked after the door unlock operation is performed once. All of the doors can be unlocked if the door unlock operation is performed again within 1 minute.
When this item is turned off, all the doors will be unlocked after the door unlock operation is performed once.
1. Press the Drive Mode Select button.
2. Press the SETUP button.
3. Turn the Selection dial to “Selective Door Unlock” then press the ENTER button.
4. Turn the Selection dial to select “ON” or “OFF”, then press the ENTER button to apply the selection. The indicator will turn red when selective door unlock is on.
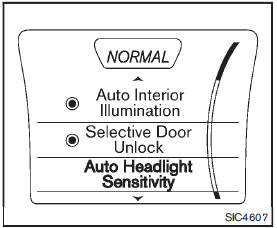
Auto Headlight Sensitivity (if so equipped)
Select to adjust the sensitivity of the automatic headlight.
1. Press the Drive Mode Select button.
2. Press the SETUP button.
3. Turn the Selection dial to “Auto Headlight Sensitivity” then press the ENTER button.
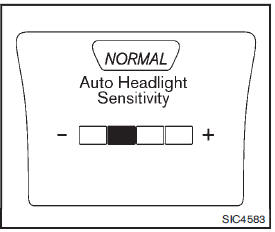
4. Turn the Selection dial to + to increase sensitivity or to − to decrease sensitivity, then press the ENTER button to apply the selection.
 Drive mode
When the Drive mode select button is pressed, the display and buttons appear
as shown.
1. Drive mode select button
2. SETUP button
3. Drive mode NORMAL button
4. Drive mode SPORT button
5. Dr ...
 Drive information
While in the Drive mode, push the Drive information button to display elapsed
time, average speed and trip distance. Pressing the Drive information button a second
time will display the G (gravi ...
Other materials:
Event Data Recorders (EDR)
This vehicle is equipped with an Event Data Recorder (EDR). The main purpose
of an EDR is to record, in certain crash or near crash-like situations, such as
an air bag deployment or hitting a road obstacle, data that will assist in understanding
how a vehicle’s systems performed.
The EDR is ...
A/C auto AMP. Connection recognition signal circuit
Diagnosis Procedure
1.CHECK A/C AUTO AMP. CONNECTION RECOGNITION SIGNAL
1. Turn ignition switch ON.
2. Check voltage between combination meter harness connector and ground.
Is the inspection result normal?
YES >> INSPECTION END
NO >> GO TO 2.
2.CHECK A/C AUTO AMP. CONNECTION R ...
For side and rollover collision : When SRS is not activated in a collision
CAUTION:
Due to varying models and option levels, not all parts listed in the chart below
apply to all vehicles.
WORK PROCEDURE
1. Before performing any of the following steps, ensure that all vehicle body
and structural repairs have been
completed.
2. Check the SRS components and the rel ...
