Nissan Juke Owners Manual : Rear seats
Folding
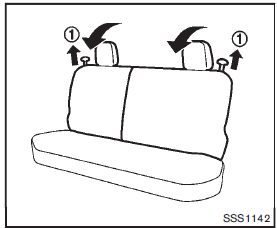
Before folding the rear seats:
Secure the seat belts on the seat belt hooks on the side wall. (See “Seat belt hooks” .) To fold the seatback, pull the adjusting knob1 .
To return the seatback to the seating position, lift up each seatback and push it to the upright position until it is latched.
CAUTION
When folding or returning the seatback(s) to the upright position, to avoid injury to yourself and others: • Make sure that the seat path is clear before moving the seat.
WARNING
• Do not fold down the rear seats when occupants are in the rear seat area or any objects are on the rear seats.
• Never allow anyone to ride in the cargo area or on the rear seats when they are in the fold-down position. Use of these areas by passengers without proper restraints could result in serious injury in an accident or sudden stop.
• Properly secure all cargo with ropes or straps to help prevent it from sliding or shifting. Do not place cargo higher than the seatbacks. In a sudden stop or collision, unsecured cargo could cause personal injury.
• When returning the seatbacks to the upright position, be certain they are completely secured in the latched position. If they are not completely secured, passengers may be injured in an accident or sudden stop.
 Front seats
Front manual seat adjustment
Forward and backward:
Pull the lever1 up and hold it while you slide the seat forward or backward
to the desired position. Release the lever to lock the seat in posi ...
 Head restraints/Headrests
WARNING
Head restraint/headrest supplement the other vehicle safety systems. They
may provide additional protection against injury in certain rear end collisions.
Adjustable head restraints/headre ...
Other materials:
B2098 ignition relay on stuck
Description
The ignition relay integrated in IPDM E/R is operated with ignition switch ON
signal from the ignition switch.
DTC Logic
DTC DETECTION LOGIC
1.PERFORM DTC CONFIRMATION PROCEDURE
1. Turn ignition switch ON.
2. Check DTC in “Self Diagnostic Result” mode of “IPDM E/R” usin ...
Precaution for Brake System
WARNING:
Clean any dust from the front brake and rear brake using a vacuum dust
collector. Never blow by compressed
air.
• Brake fluid use refer to MA-13, "Fluids and Lubricants".
• Never reuse drained brake fluid.
• Never spill or splash brake fluid on painted surfaces. Brake ...
Key switch
Component Function Check
1.CHECK FUNCTION
1. Select “DOOR LOCK” of “BCM” using CONSULT-III.
2. Select “KEY ON SW” in “DATA MONITOR” mode.
3. Check that the function operates normally according to the following
conditions.
Is the inspection result normal?
YES >> Key sw ...
