
Nissan Juke Service and Repair Manual : Body alignment
Body Center Marks (RHD Models)
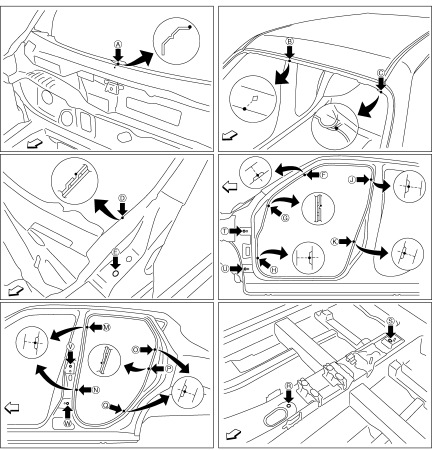
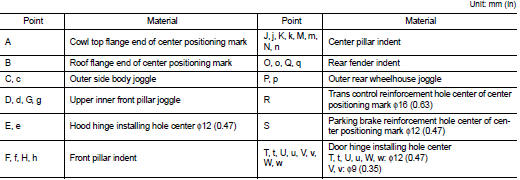
A mark is placed on each part of the body to indicate the vehicle center. When repairing the vehicle frame (members, pillars, etc.) damaged by an accident which it enables more accurate and effective repair by using these marks together with body alignment specifications.
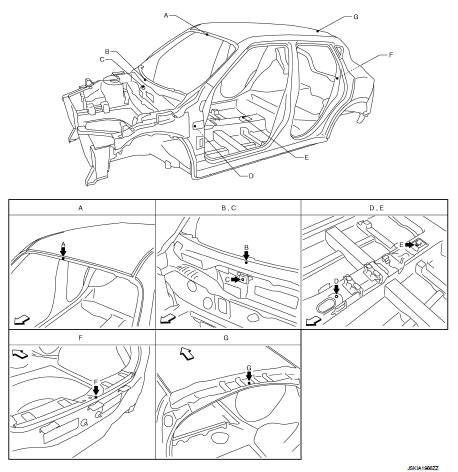
 : Vehicle front


Body Center Marks (LHD Models)
A mark is placed on each part of the body to indicate the vehicle center. When repairing the vehicle frame (members, pillars, etc.) damaged by an accident which it enables more accurate and effective repair by using these marks together with body alignment specifications.
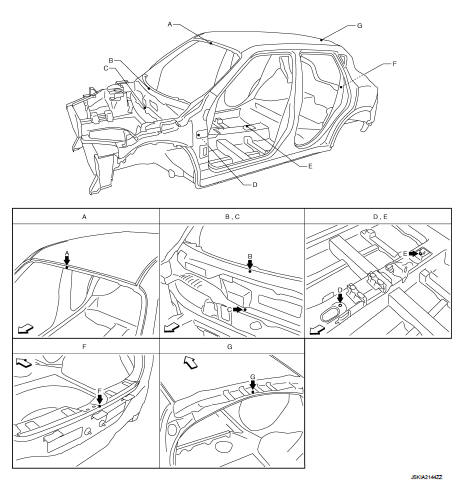
: Vehicle front


Description
• All dimensions indicated in the figures are actual.
• When using a tracking gauge, adjust both pointers to equal length. Then check the pointers and gauge itself to make sure there is no free play.
• When a measuring tape is used, check to be sure there is no elongation, twisting or bending.
• Measurements should be taken at the center of the mounting holes.
• An asterisk (*) following the value at the measuring point indicates that the measuring point on the other side is symmetrically the same value.
• The coordinates of the measurement points are the distances measured from the standard line of ″X″, ″Y″ and ″Z″.
• ″Z″: Imaginary base line [200 mm (7.87 in) below datum line (″0Z″ at design plan)]
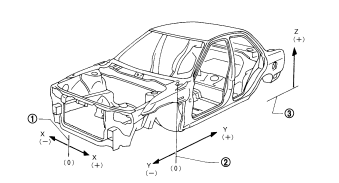
1. Vehicle center
2. Front axle center
3. Imaginary base line
Engine Compartment (2WD RHD Models)
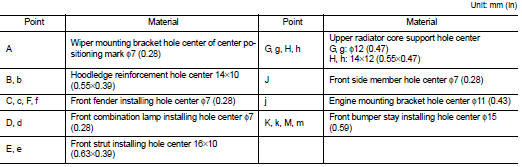
MEASUREMENT
Dimensions marked with ″*″ indicate symmetrically identical dimensions on both the right and left hand of the vehicle.
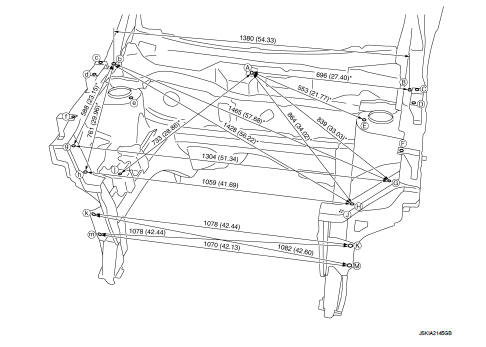
Unit: mm (in)

MEASUREMENT POINTS
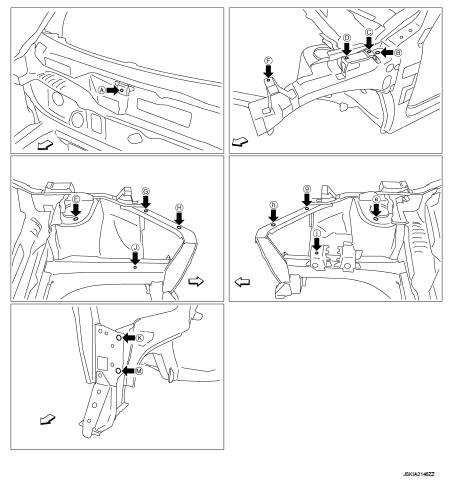
 : Vehicle front
Engine Compartment (2WD LHD Models)
MEASUREMENT
Dimensions marked with ″*″ indicate symmetrically identical dimensions on both the right and left hand of the vehicle.
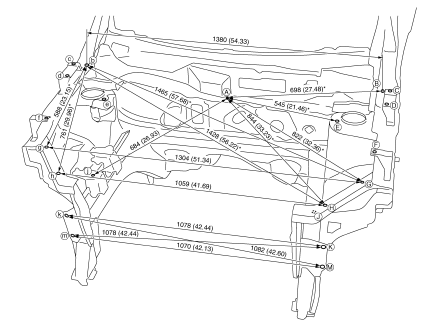
Unit: mm (in)

MEASUREMENT POINTS
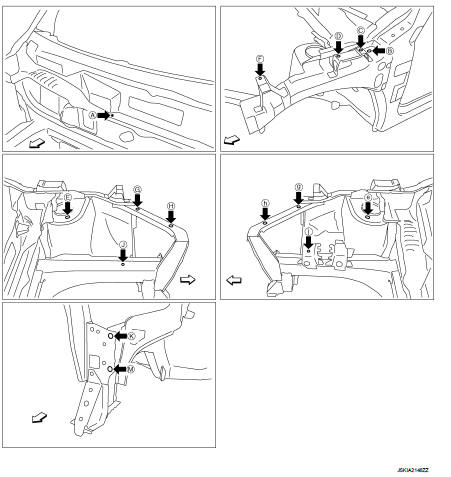
 : Vehicle front
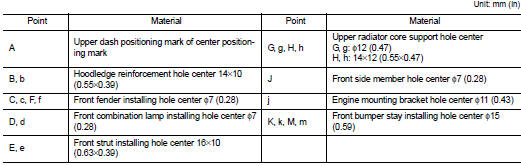
Engine Compartment (4WD RHD Models)
MEASUREMENT
Dimensions marked with ″*″ indicate symmetrically identical dimensions on both the right and left hand of the vehicle.
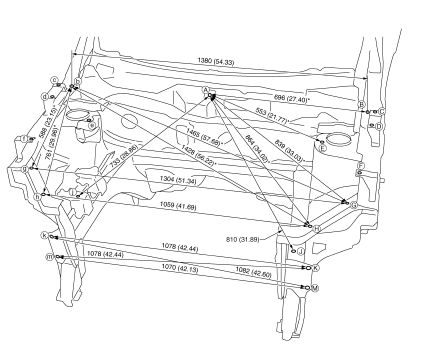
Unit: mm (in)

MEASUREMENT POINTS
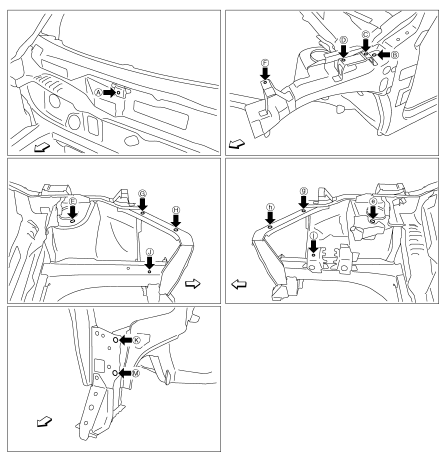
 : Vehicle front
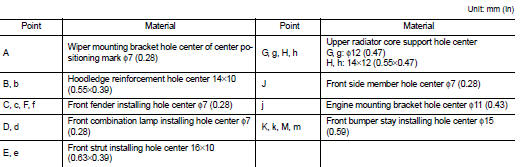
Engine Compartment (4WD LHD Models)
MEASUREMENT
Dimensions marked with ″*″ indicate symmetrically identical dimensions on both the right and left hand of the vehicle.
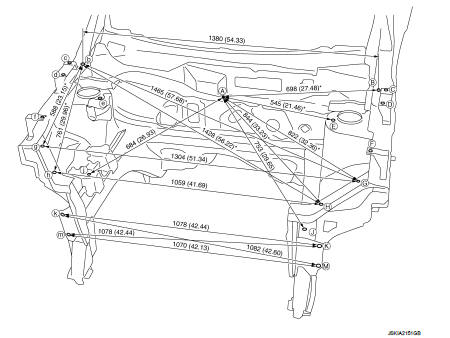
Unit: mm (in)

MEASUREMENT POINTS
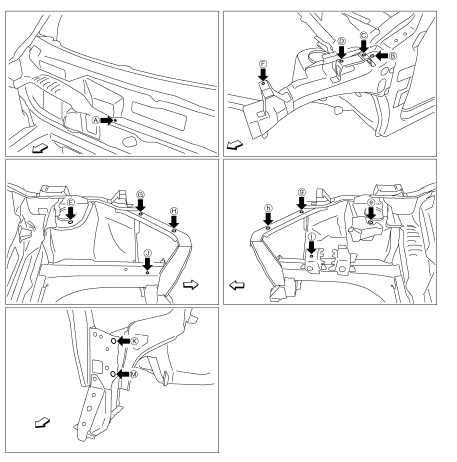
 : Vehicle front
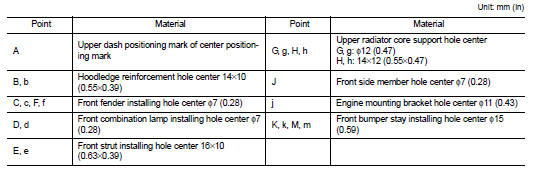
Underbody (2WD Models)
MEASUREMENT
Dimensions marked with ″*″ indicate symmetrically identical dimensions on both the right and left hand of the vehicle.
The following figure shows a bottom view and a side view of the vehicle.
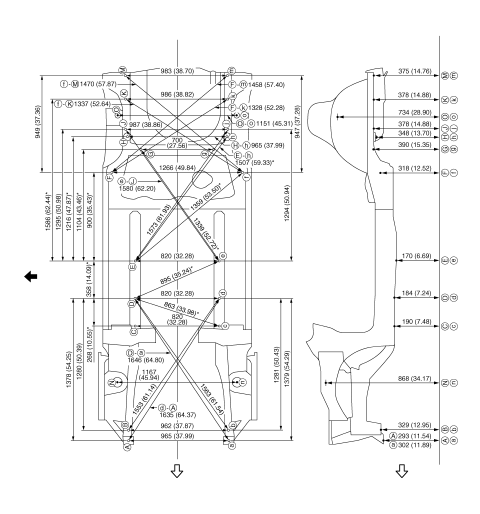
Unit: mm (in)
 : Vehicle front
 : Vehicle left side
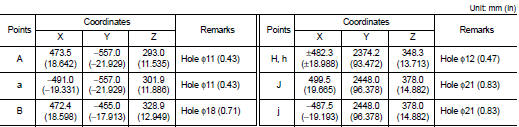
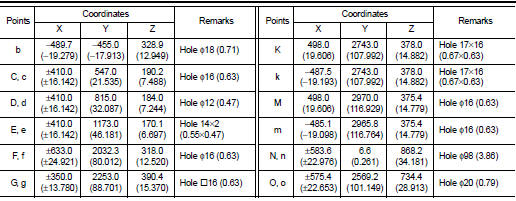
MEASUREMENT POINTS
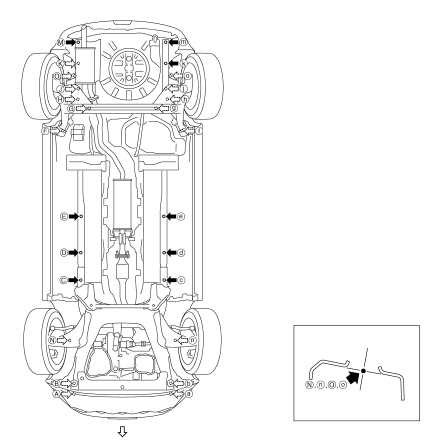
 : Vehicle front
Underbody (4WD Models)
MEASUREMENT
Dimensions marked with ″*″ indicate symmetrically identical dimensions on both the right and left hand of the vehicle.
The following figure shows a bottom view and a side view of the vehicle.
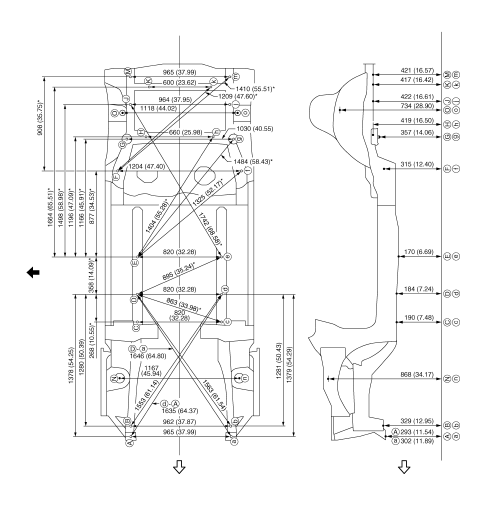
Unit: mm (in)
: Vehicle front
 : Vehicle left side
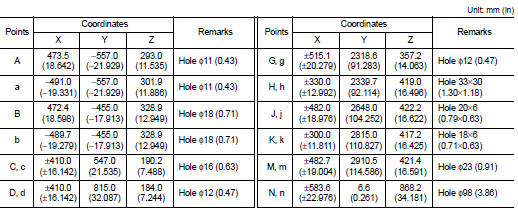
MEASUREMENT POINTS
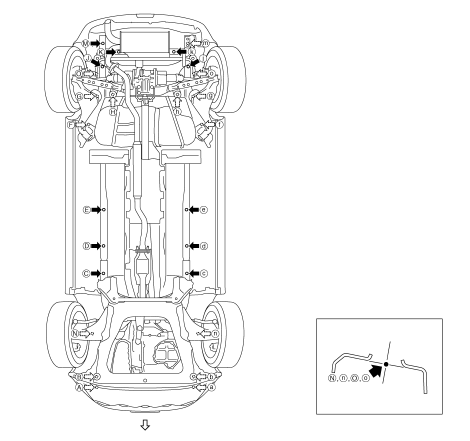
: Vehicle front

Passenger Compartment
MEASUREMENT
Dimensions marked with ″*″ indicate symmetrically identical dimensions on both the right and left hand of the vehicle.
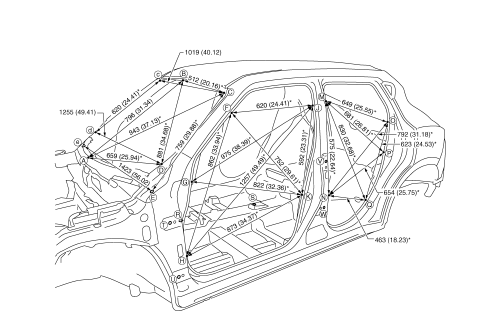
Unit: mm (in)
«The others»
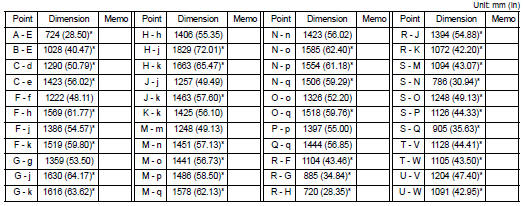
MEASUREMENT POINTS
 : Vehicle front
Rear Body
MEASUREMENT
Dimensions marked with ″*″ indicate symmetrically identical dimensions on both the right and left hand of the vehicle.
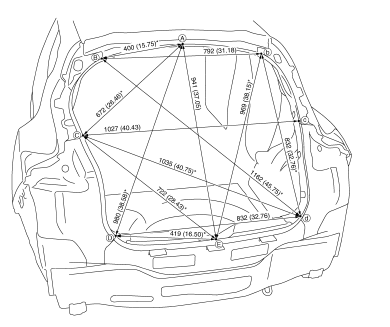
Unit: mm (in)
MEASUREMENT POINTS
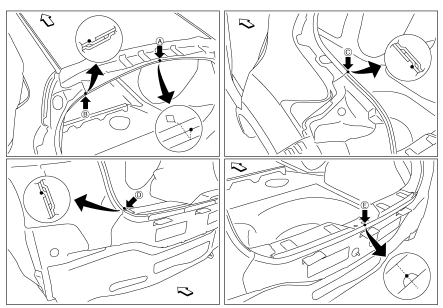
 : Vehicle front


 Location of plastic parts
Precautions for Plastics
CAUTION:
• When repairing and painting a portion of the body adjacent to plastic parts,
consider their characteristics (influence of heat
and solvent) and remove them ...
Other materials:
Does not operate
Description
ABS function and EBD function does not operate.
Diagnosis Procedure
CAUTION:
ABS function and EBD function never operate when the vehicle speed is 10 km/h
(6.2 MPH) or less.
1.CHECK ABS WARNING LAMP
Check that ABS warning lamp and brake warning lamp turn ON and turn OFF
appro ...
Engine stand setting
Setting
NOTE:
Explained here is how to disassemble with engine stand supporting transaxle
surface. When using different
type of engine stand, note with difference in steps and etc.
1. Remove the engine and the transaxle assembly from the vehicle, and separate
the transaxle from the
engine ...
G sensor calibration
Description
ECM stores calibration data (inherent characteristic value) of G sensor to
provide accurate control. Therefore,
it is required to perform calibration of G sensor after the following work is
performed.
• Removal/installation or replacement of G sensor
• Replacement of ECM
W ...
