
Nissan Juke Service and Repair Manual : Crash zone sensor
Exploded View
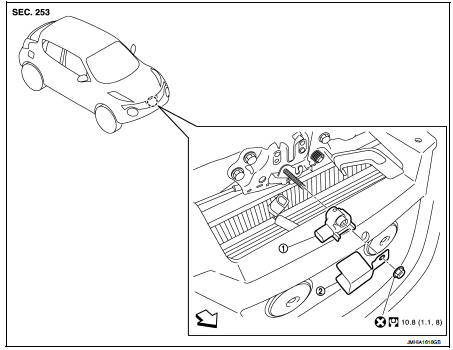
1. Crash zone sensor
2. Bracket
 : Vehicle front
 : Do not reuse
 N·m (kg-m, ft-lb)
Removal and Installation
WARNING:
• Before servicing, turn ignition switch OFF, disconnect battery negative
terminal and wait 3 minutes
or more.
• Never use the air tools or electric tools for servicing.
REMOVAL
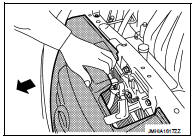
1. Remove front center grille fixing clips. Refer to EXT-18, "Removal and Installation".
2. Pull back front center grille, it makes work space.
: Vehicle front
3. Remove the crash zone sensor fixing nuts (A), and then pull the bracket (1) and crash zone sensor (2) for vehicle front.
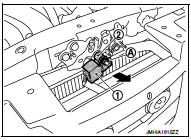
4. Disconnect the crash zone sensor harness connector, and then remove crash zone sensor.
CAUTION:
• Never impact the crash zone sensor.
• Replace the crash zone sensor if it has been dropped or sustained an impact.
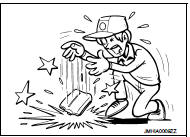
• Replace the crash zone sensor of deployed driver air bag, deployed front passenger air bag, seat belt pre-tensioner and deployed lap pre-tensioner.
INSTALLATION
Note the following items, and then install in the reverse order of removal.
CAUTION:
• Never use the old fixing nut after removal, replace with the new nut.
• Never damage the harness while installing.
• Always install normally aligning to the cutout hole, because performance of the crash zone sensor excessively fluctuates according to the installation position.
• If malfunction is detected by the air bag warning lamp, after repair or replacement of the malfunctioning parts, reset the memory using self-diagnosis or CONSULT-III. Refer to SRC-12, "On Board Diagnosis Function" or SRC-16, "CONSULT-III Function".
• After the work is completed, check that no system malfunction is detected by air bag warning lamp.
 Side curtain air bag module
Exploded View
1. Side curtain air bag module
: Metal clip
: N·m (kg-m, ft-lb)
Removal and Installation
WARNING:
• Before servicing, turn ignition switch OFF, disconnect battery negative
t ...
 Side air bag (satellite) sensor
Exploded View
1. Satellite sensor
: Vehicle front
: Do not reuse
: N·m (kg-m, ft-lb)
Removal and Installation
WARNING:
• Before servicing, turn ignition switch OFF, disconnect battery nega ...
Other materials:
Seats
WARNING
• Do not ride in a moving vehicle when the seatback is reclined. This can
be dangerous. The shoulder belt will not be against your body. In an accident, you
could be thrown into it and receive neck or other serious injuries. You could also
slide under the lap belt and receive seri ...
System
Headlamp system
HEADLAMP SYSTEM : System Diagram
HEADLAMP SYSTEM : System Description
OUTLINE
Headlamp is controlled by combination switch reading function and headlamp
control function of BCM, and
relay control function of IPDM E/R.
HEADLAMP (LO) OPERATION
• BCM detects the combinati ...
Removal and installation
REAR WHEEL HUB
Exploded View
1. Rear suspension beam
2. Rear brake assembly
3. Hub bolt
4. Wheel hub assembly (Bearing-integrated
type)
5. Disc rotor
6. Plug
: Always replace after every
disassembly.
: N·m (kg-m, ft-lb)
Removal and Installation
REMOVAL
1. Remove tires. Refer to ...
