Nissan Juke Service and Repair Manual : Steering wheel
Exploded View
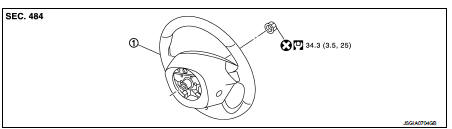
1. Steering wheel
 : Always replace after every
disassembly.
 : N·m (kg-m, ft-lb)
Removal and Installation
REMOVAL
NOTE
:
When reconnecting spiral cable, fix cable with a tape so that fixing case and
rotating part keep aligned. This
will omit neutral position alignment procedure during spiral cable installation.
1. Set vehicle to the straight-ahead position.
2. Remove driver air bag module. Refer to SR-13, "Removal and Installation".
3. Remove steering wheel lock nut after steering is locked.
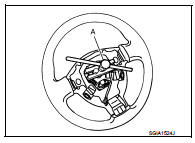
4. Remove steering wheel with the steering wheel puller (A) (SST: ST27180001)
INSTALLATION
Note the following, and install in the reverse order of removal.
• Check the spiral cable neutral position after replacing or rotating spiral cable. Refer to SR-16, "Removal and Installation".
CAUTION:
Never twist spiral cable excessively after it becomes tight. (Twisting may cause
the cable to be torn
off.)
• Never reuse steering wheel lock nut.

 Steering column
Exploded View
1. Cover
2. Sub-harness
3. Band
4. Steering column assembly
5. Slide plate (inner)
6. Slide plate (outer)
7. Bracket
Always replace after every
disassembly.
: N·m (kg- ...
Other materials:
P0841 transmission fluid pressure SEN/SW A
Description
Using the engine load (throttle position), the primary pulley revolution
speed, and the secondary pulley revolution
speed as input signal, TCM changes the operating pressure of the primary pulley
and the secondary pulley
and changes the groove width of the pulley to control the ge ...
Diagnosis and repair work flow
Flowchart of Trouble Diagnosis
NOTE:
“DTC” includes DTC at the 1st trip.
1.OBTAIN INFORMATION ABOUT SYMPTOM
1. Refer to TM-372, "Question sheet" and interview the customer to obtain the
malfunction information (conditions
and environment when the malfunction occurred) as much ...
B2604 shift position
DTC Logic
DTC DETECTION LOGIC
NOTE:
• If DTC B2604 is displayed with DTC U1000, first perform the trouble diagnosis
for DTC U1000. Refer to
BCS-83, "DTC Logic".
• If DTC B2604 is displayed with DTC U1010, first perform the trouble diagnosis
for DTC U1010. Refer to
BCS-84, &qu ...
