
Nissan Leaf 2018-2025 (ZE1) Owner's Manual : Instrument brightness control
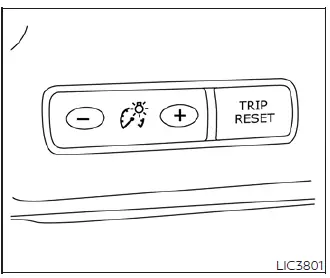
You can easily customize the visibility of your display by pressing the "+" button to increase the brightness of the instrument panel lights, or by pressing the "-" button to decrease the intensity to a more comfortable level for your driving environment.
Turn signal switch
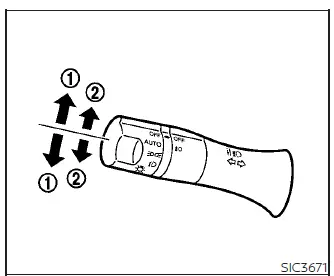
Turn signal
- Move the lever up or down until it reaches the latching position to signal your intention to turn. Once the maneuver is complete, the turn signal will cancel automatically.
Lane change signal
- For a manual lane change signal, move the lever up or down until the signal begins to flash without latching the lever, and hold it in place until your lane change is finished. Alternatively, for a quick lane change, move the lever until it flashes and release it; the turn signal will then automatically flash three times. Choose the signaling method that best suits the current traffic conditions for your Nissan Leaf.
Fog light switch
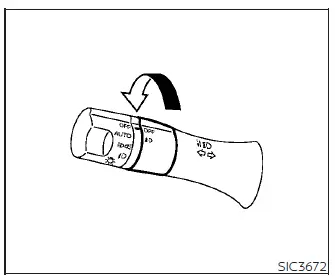
To activate the fog lights, first ensure the headlight switch is in the
 position, then rotate the fog light ring to the
 position. To deactivate them, simply rotate the switch back to the OFF position. Please note that the headlights must be active for the fog lights to operate.
Emblem Light
The distinctive emblem light on your Nissan Leaf operates independently of the headlight switch. It illuminates automatically whenever the power switch is in the ON position and will turn off once the power switch is set to the OFF position.
 LED Daytime Running Lights (DRL) system (Type A)
The LED Daytime Running Lights (DRL) on your Nissan Leaf are designed for enhanced visibility, automatically illuminating at 100% intensity whenever the power switch is in the READY to drive position, ...
 Horn
Horn
To alert other drivers, simply push the center pad area of the steering wheel to sound the horn.
WARNING
Do not attempt to disassemble the horn assembly. Any unauthoriz ...
Other materials:
Side oil seal
Removal and Installation
REMOVAL
1. Remove front drive shafts. (MR16DDT) Refer to FAX-22, "LEFT SIDE : Removal
and Installation" (LEFT
SIDE) and FAX-24, "RIGHT SIDE : Removal and Installation" (RIGHT SIDE).
2. Remove front drive shafts. (K9K) Refer to FAX-78, "LEFT SID ...
P1830 ABS operation signal
DTC Logic
DTC DETECTION LOGIC
DTC CONFIRMATION PROCEDURE
1.DTC REPRODUCTION PROCEDURE
With CONSULT-III
1. Start the engine and drive at 30 km/h (19 MPH) or more.
2. Perform self-diagnosis for “ALL MODE AWD/4WD�.
Is DTC “P1830� detected?
YES >> Proceed to diagnosis procedure ...
Clutch fluid
RS5F92R : Inspection
FLUID LEAKAGE
• Check clutch line for cracks, deterioration or other damage. Replace any
damaged parts.
• Check for fluid leakage by fully depressing clutch pedal while engine is
running.
CAUTION:
If leakage occurs around joints, reinstall the joints or, if necess ...
