Nissan Juke Owners Manual : How to use the setup button
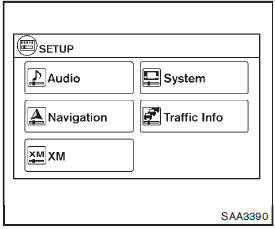
When the SETUP button is pushed, the Setup screen will appear on the display. You can select and/or adjust several functions, features and modes that are available for your vehicle.
Audio setup
Select the ÔÇťAudioÔÇŁ key to adjust the following items to the preferred setting. These settings can also be displayed by pushing the AUDIO button (TUNE/SCROLL knob).
Bass, Treble, Balance and Fade:
Controls the sound of the audio system. Balance adjusts the sound between the left and right speakers. Fade adjusts the sound between the front and rear speakers.
Speed Volume:
Controls the level to which the volume is adjusted as the vehicleÔÇÖs driving speed changes.
Choose a setting between 1 and 5 or choose 0 to disable the feature entirely.
AUX Level:
Controls the volume level of incoming sound when an auxiliary device is connected to the system. Available options are Quiet, Medium and Loud.
Navigation setup
Refer to the separate Navigation System OwnerÔÇÖs Manual for information regarding this item.
XM setup
For SiriusXM Satellite Radio setup, refer to ÔÇťFMAM- SAT radio with Compact Disc (CD) player (Type B)ÔÇŁ .
System setup
Select the ÔÇťSystemÔÇŁ key to select and/or adjust various functions of the system. A screen with additional options will appear.
Display:
Select the ÔÇťDisplayÔÇŁ key to adjust the appearance of the display. The following settings can be adjusted: ÔÇó Brightness
: The brightness of the display can be set to Very Bright, Bright, Default, Dark or Very Dark. Touch the ÔÇťBrightnessÔÇŁ key to cycle through the options.
ÔÇó Display Mode:
The display can be adjusted to fit the level of lighting in the vehicle. Touch the ÔÇťDisplay ModeÔÇŁ key to cycle through the options. ÔÇťDayÔÇŁ and ÔÇťNightÔÇŁ modes are suited for the respective times of day, while ÔÇťAutomaticÔÇŁ controls the display automatically.
ÔÇó Scroll Direction:
The direction that menus scroll can be adjusted.
Choose either ÔÇťupÔÇŁ or ÔÇťdownÔÇŁ.
Clock:
Select the ÔÇťClockÔÇŁ key to adjust the time and the appearance of the clock on the display. The following settings can be adjusted: ÔÇó Time Format:
The clock can be set to 12 hours or 24 hours.
ÔÇó Use GPS Clock:
When this setting is activated, the clock is set and continually updated via the GPS used by the Navigation System.
ÔÇó Set Clock Manually:
When this setting is activated, the clock can be set manually. Touch the ÔÇť+ÔÇŁ or ÔÇť−ÔÇŁ key to adjust the hours and minutes up or down.
ÔÇó Daylight Savings Time:
When this setting is activated, daylight savings time is on. Touch the ÔÇťDaylight Savings TimeÔÇŁ key to toggle the setting on or off.
ÔÇó Time Zone:
Choose the applicable time zone from the list.
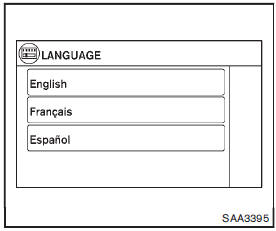
Language:
Select the ÔÇťLanguageÔÇŁ key to adjust the language used by the system. The language can be set to English, Franc¸ ais or Espan˜ ol.
Touch click:
Select the ÔÇťTouch ClickÔÇŁ key to toggle the touch click feature on or off. When activated, a click sound will be heard every time a key on the screen is touched.
Beep tones:
Select the ÔÇťBeep TonesÔÇŁ key to toggle the beep tones feature on or off. When
activated, a beep sound will be heard when a pop-up message appears on the screen
or a button on the unit (such as the 
button) is pressed and held for two seconds.
Reset all settings/memory:
Select the ÔÇťReset All Settings/MemoryÔÇŁ key to return all settings to default and to clear the memory.
Traffic Info setup
Refer to the separate Navigation System OwnerÔÇÖs Manual for information regarding this item.
 How to use brightness control and display ON/OFF button
To change the display brightness, push the
button. Pushing the button again will
change the display to the day or the night display.
If no operation is performed within 5 seconds, the display wil ...
 RearView monitor (if so equipped)
When the shift lever is shifted into the R (Reverse) position, the monitor display
shows the view to the rear of the vehicle.
The system is designed as an aid to the driver in situations such as sl ...
Other materials:
Fluid cooler system
Exploded View
1. Copper washer
2. CVT fluid cooler tube
3. Hose clamp
4. Fluid cooler hose A
5. Fluid cooler tube
6. Fluid cooler hose B
7. Fluid cooler hose C
8. Transaxle assembly
9. Fluid cooler hose D
10. Fluid cooler hose E
11. Fluid cooler hose F
12. Bypass valve
13. Flu ...
Forward-facing child restraint installation using the seat belts
WARNING
You must utilize the three-point seat belt system equipped with an Automatic Locking Retractor (ALR) whenever you install a child restraint in your Nissan Leaf.
Failure to properly engage the ALR mode prevents the child restraint from being secured correctly. A loose or unstable re ...
Upper link
Exploded View
1. Rear suspension member
2. Adjusting bolt
3. Upper link
4. Eccentric disk
5. Lower link
6. Suspension arm bracket
7. Suspension arm
: Vehicle front
: Always replace after every
disassembly.
: N┬Ěm (kg-m, ft-lb)
Removal and Installation
REMOVAL
1. Remove tires. WT ...
