Nissan Juke Service and Repair Manual : Diagnosis and repair work flow
Work Flow
OVERALL SEQUENCE
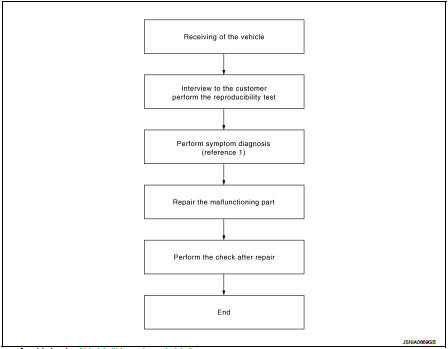
Reference 1··· Refer to AV-77, "Symptom Table".
DETAILED FLOW
1.CHECK SYMPTOM
Check the malfunction symptoms by performing the following items.
• Interview the customer to obtain the malfunction information (conditions and environment when the malfunction occurred).
• Check the symptom.
>> GO TO 2.
2.PERFORM DIAGNOSIS BY SYMPTOM
Perform the relevant diagnosis referring to the diagnosis chart by symptom. Refer to AV-77, "Symptom Table".
>> GO TO 3.
3.REPAIR OR REPLACE MALFUNCTIONING PARTS
Repair or replace the malfunctioning parts.
>> GO TO 4.
4.FINAL CHECK
Perform the operation to check that the malfunction symptom is solved or any other symptoms are present.
Is there any symptom? YES >> GO TO 2.
NO >> INSPECTION END
 Basic inspection
...
 Additional service when removing battery negative terminal
Description
• The NAVI control unit is equipped with the anti-theft system.
• The NAVI control unit operates after authenticating a fixed four-digit
anti-theft code.
• After removing the ba ...
Other materials:
Normal operating condition
Description
FUEL CUT CONTROL (AT NO LOAD AND HIGH ENGINE SPEED)
If the engine speed is above 1,800 rpm under no load (for example, the
selector lever position is neutral and
engine speed is over 1,800 rpm) fuel will be cut off after some time. The exact
time when the fuel is cut off varies
b ...
All-Wheel Drive (AWD) mode switch operations
AWD mode switch
The All-Wheel Drive (AWD) system is used to select the 2WD (Two-Wheel Drive),
AWD-V or AWD mode depending on the driving conditions.
The AWD mode indicator lights ( (green),
) are located in the instrument panel.
The AWD mode indicator lights (green)
illuminate when the ig ...
Tow Truck Towing
CAUTION:
• All applicable state or Provincial laws and local laws regarding the towing
operation must be
obeyed.
• It is necessary to use proper towing equipment to avoid possible damage to the
vehicle during towing
operation. Towing is in accordance with Towing Procedure Manual at deale ...
