Nissan Juke Service and Repair Manual : Evap canister
2WD : Hydraulic Layout
EVAPORATIVE EMISSION LINE DRAWING
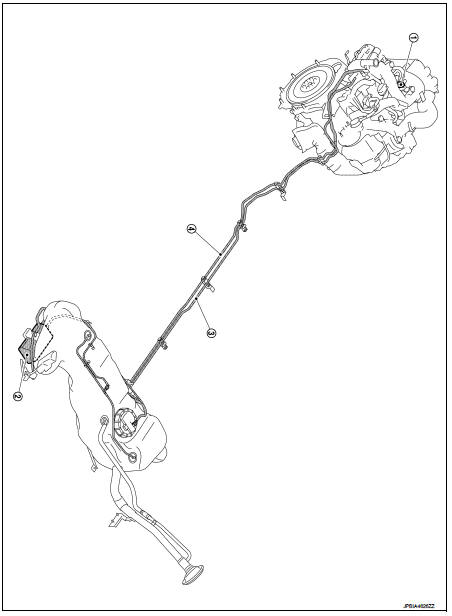
1.EVAP canister purge volume control
solenoid valve
2. EVAP canister
3. EAVP line
4. Fuel line
NOTE
:
Do not use soapy water or any type of solvent while installing vacuum hose or
purge hoses.
2WD : Removal and Installation
REMOVAL
1. Disconnect EVAP canister hoses.
2. Remove EVAP canister fixing bolt.
3. Remove EVAP canister.
INSTALLATION
Install in the reverse order of removal.
NOTE
:
Tighten EVAP canister fixing bolt to the specified torque.
4WD : Hydraulic Layout
EVAPORATIVE EMISSION LINE DRAWING
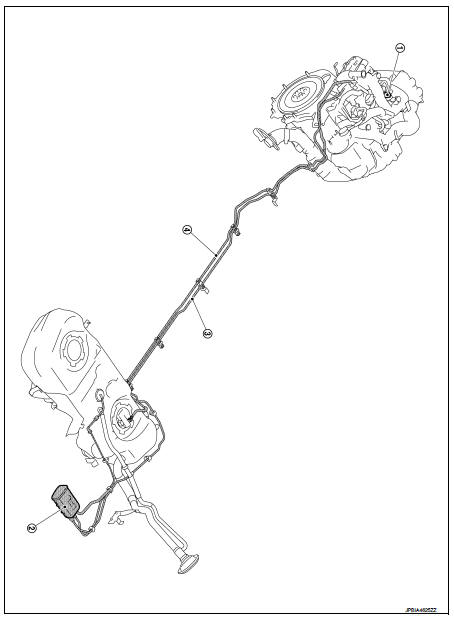
1. EVAP service port
2. EVAP canister
3. EVAP line
4. Fuel line
NOTE
:
Do not use soapy water or any type of solvent while installing vacuum hose or
purge hoses.
4WD : Removal and Installation
REMOVAL
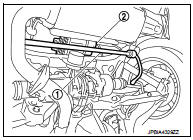
1. Remove rear stabilizer (1). Refer to RSU-34, "Exploded View".
2. Disconnect EVAP canister hoses.
3. Remove EVAP canister fixing bolt.
4. Remove EVAP canister (2).
INSTALLATION
Install in the reverse order of removal.
NOTE
:
Tighten EVAP canister fixing bolt to the specified torque.
 Fuel tank
2WD : Exploded View
1. Fuel filler cap
2. Grommet
3. Fuel filler tube
4. EVAP canister hose
5. Fuel tank mounting band (RH)
6. Fuel tank mounting band (LH)
7. Fuel tank
8. Clamp
9. Fu ...
 Service data and specifications (SDS)
Fuel Tank
Standard and Limit
...
Other materials:
U1010 control unit (CAN)
Description
CAN (Controller Area Network) is a serial communication line for real time
application. It is an on-vehicle multiplex
communication line with high data communication speed and excellent error
detection ability. Many electronic
control units are equipped onto a vehicle, and each co ...
U1001 Can comm circuit
Description
CAN (Controller Area Network) is a serial communication line for real time
application. It is an on-vehicle multiplex
communication line with high data communication speed and excellent error
detection ability. Many electronic
control units are equipped onto a vehicle, and each c ...
Parts Requiring Angle Tightening
• Use the angle wrench [SST: KV10112100] for the final tightening of the
following engine parts:
- Camshaft sprocket (INT) bolt
- Cylinder head bolts
- Main bearing cap bolts
- Connecting rod cap bolts
- Crankshaft pulley bolt (No the angle wrench is required as bolt flange is
provided with ...
