Nissan Juke Service and Repair Manual : Corrosion protection
Description
To provide improved corrosion prevention, the following anti-corrosive measures have been implemented in NISSAN production plants. When repairing or replacing body panels, it is necessary to use the same anti-corrosive measures.
ANTI-CORROSIVE PRECOATED STEEL (GALVANNEALED STEEL)
To improve repairability and corrosion resistance, a new type of anticorrosive precoated steel sheet has been adopted replacing conventional zinc-coated steel sheet.
Galvannealed steel is electroplated and heated to form Zinc-iron alloy, which provides excellent and long term corrosion resistance with cationic electrodeposition primer.
Nissan Genuine Service Parts are fabricated from galvannealed steel. Therefore, it is recommended that GENUINE NISSAN PARTS or equivalent be used for panel replacement to maintain the anti-corrosive performance built into the vehicle at the factory.
PHOSPHATE COATING TREATMENT AND CATIONIC ELECTRODEPOSITION PRIMER
A phosphate coating treatment and a cationic electrodeposition primer, which provide excellent corrosion protection, are employed on all body components.
CAUTION:
Confine paint removal during welding operations to an absolute
minimum.
Nissan Genuine Service Parts are also treated in the same manner. Therefore, it is recommended that GENUINE NISSAN PARTS or an equivalent be used for panel replacement to maintain anti-corrosive performance built into the vehicle at the factory.
Anti-corrosive Wax
To improve corrosion resistance, anti-corrosive wax is applied inside the body sill and inside other closed sections.
Accordingly, when replacing these parts, be sure to apply anti-corrosive wax to the appropriate areas of the new parts. Select an excellent anti-corrosive wax which will penetrate after application and has a long shelf life.
DOOR
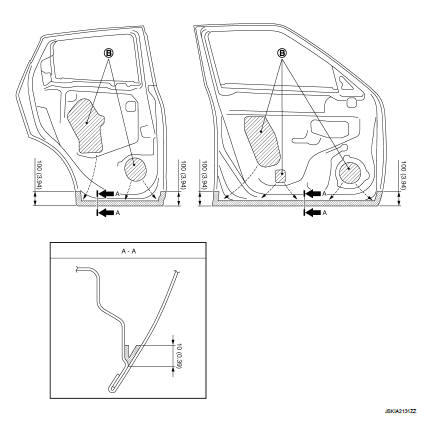
B. Nozzle insert hole
Unit: mm (in)
 : Anti-corrosive wax coated
portions
Undercoating (2WD Models)
The underside of the floor and wheelhouse are undercoated to prevent rust, vibration, noise and stone chipping.
Therefore, when such a panel is replaced or repaired, apply undercoating to that part. Use an undercoating which is rust resistant, soundproof, vibration-proof, shock-resistant, adhesive, and durable.
PRECAUTIONS IN UNDERCOATING
1. Never apply undercoating to any place unless specified (such as the areas above the muffler and threeway catalyst that are subjected to heat).
2. Never undercoat the exhaust pipe or other parts that become hot.
3. Never undercoat rotating parts.
4. Apply bitumen wax after applying undercoating.
5. After putting seal on the vehicle, put undercoating on it.
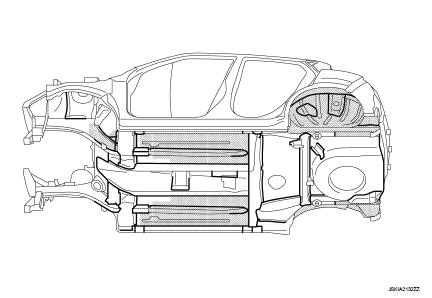
 : Undercoated areas
 : Sealed portions
Undercoating (4WD Models)
The underside of the floor and wheelhouse are undercoated to prevent rust, vibration, noise and stone chipping.
Therefore, when such a panel is replaced or repaired, apply undercoating to that part. Use an undercoating which is rust resistant, soundproof, vibration-proof, shock-resistant, adhesive, and durable.
PRECAUTIONS IN UNDERCOATING
1. Never apply undercoating to any place unless specified (such as the areas above the muffler and threeway catalyst that are subjected to heat).
2. Never undercoat the exhaust pipe or other parts that become hot.
3. Never undercoat rotating parts.
4. Apply bitumen wax after applying undercoating.
5. After putting seal on the vehicle, put undercoating on it.
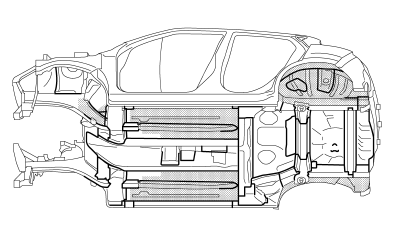
: Undercoated areas
: Sealed portions
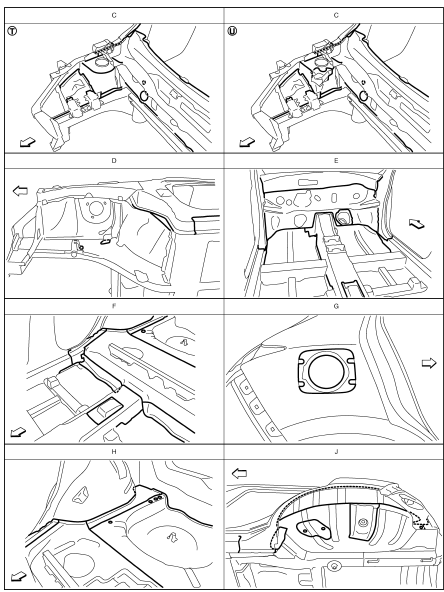
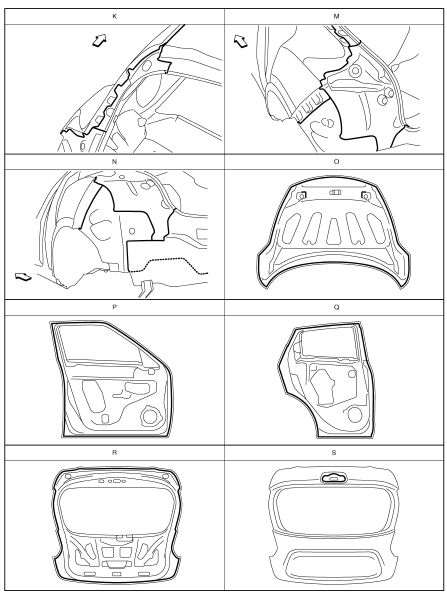
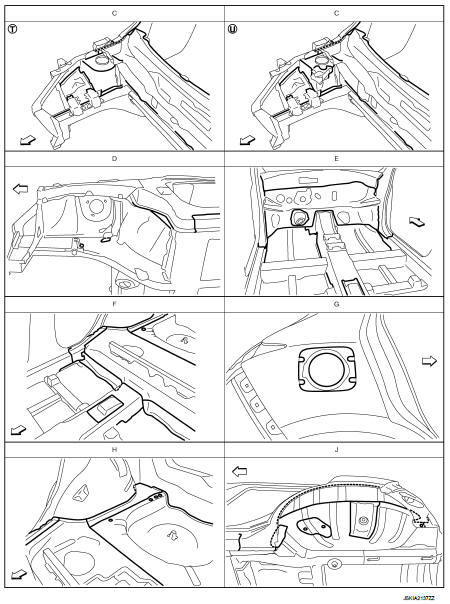
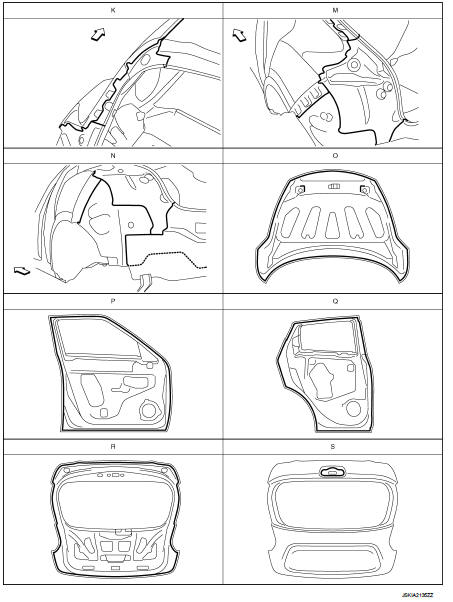
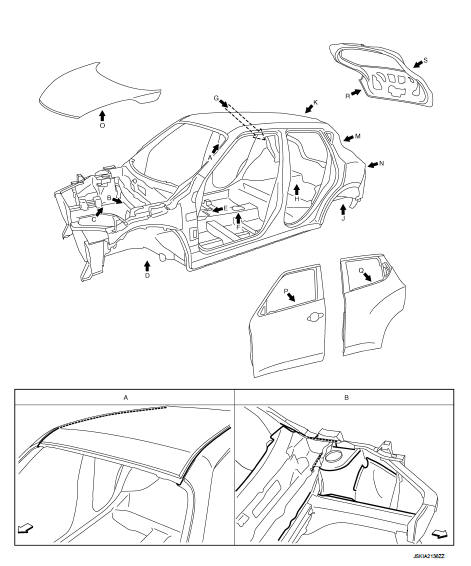
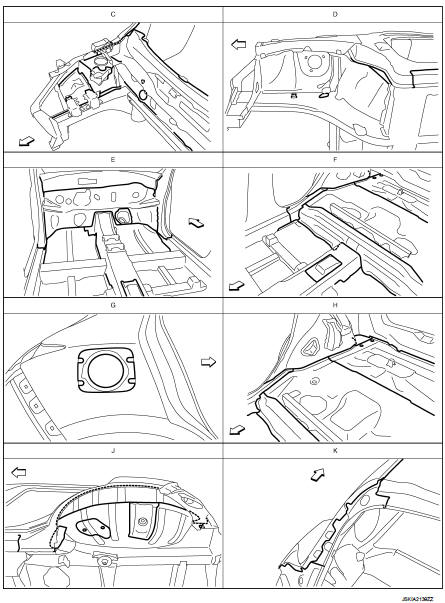
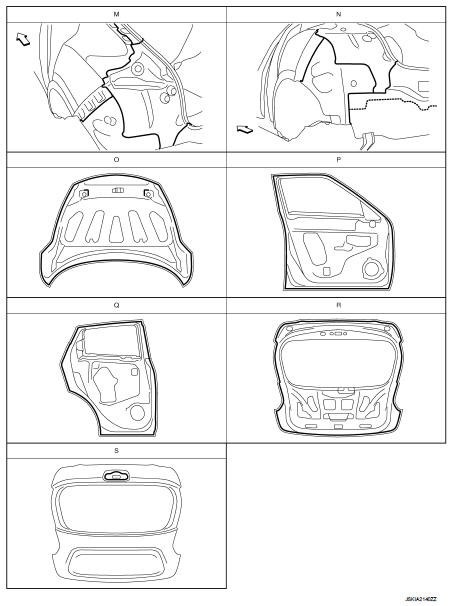
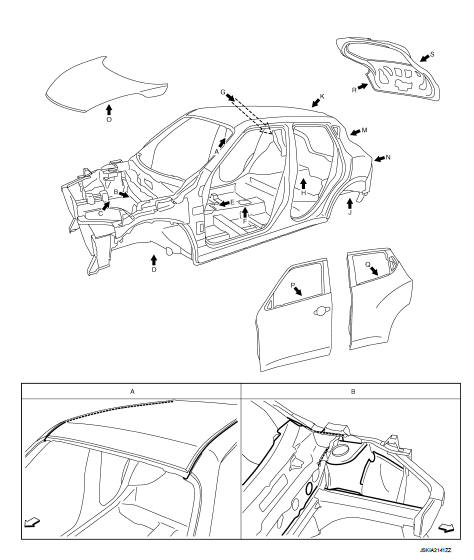
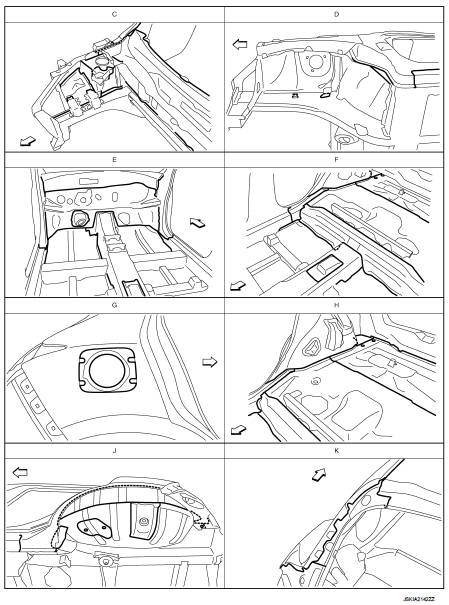
Body Sealing (2WD RHD Models)
The following figure shows the areas that are sealed at the factory. Sealant that is applied to these areas should be smooth and free from cuts or gaps. Care should be taken not to apply an excess amount of sealant and not to allow other unaffected parts to come into contact with the sealant.

 : Vehicle front
 : Sealed portions
T. HR16DE Engine models U. MR16DDT and K9K Engine models
 : Vehicle front
 : Sealed portions
 : Vehicle front
 : Sealed portions
Body Sealing (2WD LHD Models)
The following figure shows the areas that are sealed at the factory. Sealant that is applied to these areas should be smooth and free from cuts or gaps. Care should be taken not to apply an excess amount of sealant and not to allow other unaffected parts to come into contact with the sealant.
 : Vehicle front
 : Sealed portions
T. HR16DE Engine models U. MR16DDT and K9K Engine models
 : Vehicle front
 : Sealed portions
 : Vehicle front
 : Sealed portions
Body Sealing (4WD RHD Models)
The following figure shows the areas that are sealed at the factory. Sealant that is applied to these areas should be smooth and free from cuts or gaps. Care should be taken not to apply an excess amount of sealant and not to allow other unaffected parts to come into contact with the sealant.
: Vehicle front
: Sealed portions
: Vehicle front
: Sealed portion
: Vehicle front
: Sealed portion
Body Sealing (4WD LHD Models)
The following figure shows the areas that are sealed at the factory. Sealant that is applied to these areas should be smooth and free from cuts or gaps. Care should be taken not to apply an excess amount of sealant and not to allow other unaffected parts to come into contact with the sealant.
: Vehicle front
: Sealed portion
: Vehicle front
: Sealed portion
: Vehicle front
: Sealed portion

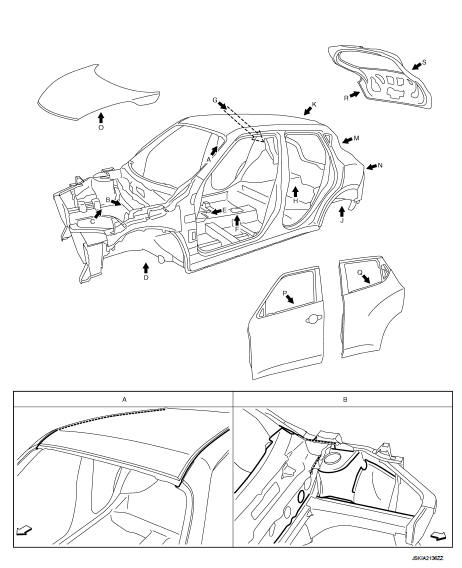
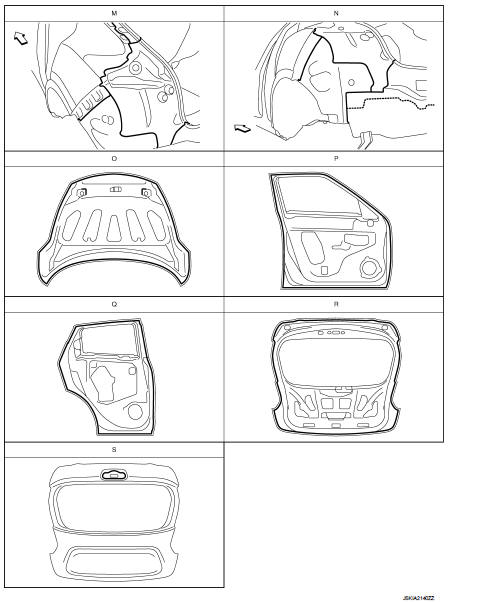
 Body construction
Body Construction (RHD Models)
1. Outer side body
2. Outer front pillar reinforcement
3. Upper inner front pillar
4. Lower dash
5. Hoodledge reinforcement
6. Lower front pillar hinge brace ...
Other materials:
Sealant or/and Lubricant
HFC-134a (R-134a) Service Tool and Equipment
• Never mix HFC-134a (R-134a) refrigerant and/or its specified lubricant with
CFC-12 (R-12) refrigerant and/
or its lubricant.
• Separate and non-interchangeable service equipment must be used for handling
each type of refrigerant/
lubricant.
• R ...
Front door finisher
Exploded View
LHD models
1. Front door panel
2. Front door finisher
3. Cap
4. Pull handle
5. Power window switch finisher
6. Pull handle bracket
: Clip
: Pawl
: Metal clip
Removal and Installation
REMOVAL
CAUTION:
• When removing, always use a remover tool that is made of plastic ...
Precaution
Service Notice or Precautions for Rear Final Drive
• Check for the correct installation status prior to removal or disassembly.
If matching marks are required, be
certain they do not interfere with the function of the parts when applied.
• Overhaul should be done in a clean work area, it is pre ...
